Linux的网络管理
本文共 1725 字,大约阅读时间需要 5 分钟。
Ping命令在Linux中的用法:
限制ping的次数:ping -c 100 www.baidu.com 限制ping的时间:ping www.baidu.com -i 0.01(0.01秒)在大多数情况下,我们会在Iinux主机系统下。直接执行命令行:
[root@qfedu .com -]# traceroute hostnane Traceroute的工作原理: Traceroute程序的设计是利用ICMP及P header的TL( Time To Live)栏位(fled).首先,traceroute送出一个TTL是 1的P datagram (其实,每次送出的为3个40字节的包,包括源地址,目的地址和包发出的时间标签)到目的地,当路径上的第一个路由器 ( router )收到这个datagram时,它将TTU减1。此时,TTL变为0了。所以该路由器会将datagram丢掉,并送回一个[ICMP time eceded]消息(包括发P包的源地址, IP包的所有内容及路由器的IP地址), traceroute收到这个消息后,便知道这个路由器存在于这个路径上,接着traceroute再送出另一个TTL是2的datagram ,发现第2个路由器… traceroute每次将送出的datagram的TTL加1来发现另一个路由器,这个重复的动作一直持续到某个datigpam抵达目的地。当datagra到达目的地后,该主机并不会送回ICMP time exceded消息,因为它已是目的地了,那么traceroute如何得知目的地到站了呢? Traceroute在送出UDP datagrams到目的地时.它所选择送达的port number是-个般应用程序都不会用的号码( 3000以上) ,所以当此UDP datagram到达目的地后该主机会送回一个「ICMP port unreachable」的消息,而当raceroute收到这个消息时,便知道目的地已经到达了。所以uraceroute 在Senver端也是没有所谓的Daemon程式。 Traceroute提取发ICMP TTL到期消息设备的IP地址并作域名解析。每次, Traceroue部打印出一系列数据,包括所经过的路由设备的域名及IP地址三个包每次来回所花时间。
 如果执行过程中没有traceroute命令,可通过
yum -y install traceroute命令安装下( roo权网在战安装) 1.命令格式: [root@qfedu.com ~]# traceroute [步数] [主机] 2:命令功能: traceroute指令让你追踪网络数据包的路由途径,预设数据包大小是40Bytes ,用户可易行设置。 具体参数格式: [root@qfedu .com ~]traceroute [-dFlnrvx][-f<存活数值>][-g<网关>…][-i<网络界面>][-m<存活数值>][-p<通信端口>][-s<来源地址>][-t<服务类型>] [-w<超时秒数>][主机名称或ip地址][数据包大小]
3.命令参数:
-d:使用Socket层极的排错功能。 -f:设置第一个检测数据包的存活数值TTL的大小。 -F:设置勿离断位。 -g:设置来源路由网关。最多可设需8个。 -i:使用指定的网络界而送出数据包。 -I:使用ICMP回应取代UDP资料信息。 -m:设置检测数据包的最大存活数值TTL的大小。 -n:直接使用IP地址而非主机名称。 -p:设置UDP传输协议的通信端口。 -r:忽略普通的Routing Table。直接将数据包送到远端主机上。 -s:设置本地主机送出数据包的IP地址。 -t:设置检测数据包的TOS数值。 -v:详细显示指令的执行过程。 -w:设置等待远端主机回报的时间。 -x:开启或关闭数据包的正确性效应。设置traceroute的跳数:
 显示IP地址,不查主机名:
探测包使用的基本UDP端口设置6888:
 绕过路由表直接发送到网络相逢的主机:
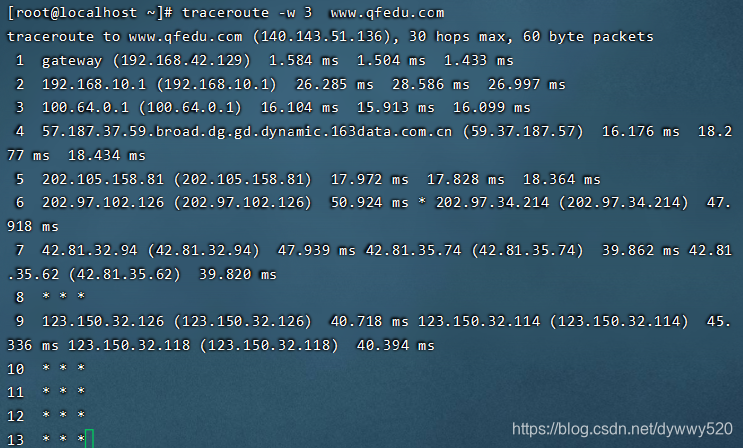
把对外发的探测包的等待时间设置为3秒:
转载地址:http://vxun.baihongyu.com/
你可能感兴趣的文章